So I LOVE sketchnoting. You may have seen some of my Aspire 2Be sketchnotes on Twitter (BethTeachesTech), or on our website but here’s the thing. I have NO formal training, I don’t have any qualifications in art or drawing or design (other than Art GCSE!) I just LOVE to doodle. When I look back, I realise that all of my revision notes were done with drawings, and doodles, and I am absolutely a visual learner – symbols trigger my memory. So when I got my hands on an iPad Pro and Apple Pencil, I just ‘had a go’. Here’s some facts for you…
- You don’t have to be an artist! (I’m not!)
- The process of creating a sketchnote digitally is super cool when watched back in time lapse!
- Sketchnoting helps you to digest info, and really understand it!
- Have a go! I failed LOADS of times, and still do – you can see how many times I change my mind when drawing, in my timelapse videos.
So how to get started?! You can sketchnote using pen and paper, or digitally. I use an iPad Pro, Apple pencil and my favourite app ‘Procreate’ so I’ll talk you through my process…
I always start by finding an article or website, with the info I want to include. I read it, re-read it, and summarise the points in my head. Make a note of where the info. comes from, and be sure to reference it in your sketchnote!
In Procreate, I turn ‘drawing guides’ on. This provides me with a squared grid in the background, to allow me to align my drawings.

Next I use a pencil brush to do a super rough sketch of how I want the sketch to look in my head.
Once my pencil sketch is done on the bottom layer, I create lots of other layers on top of it and begin to draw the individual elements on top of the initial pencil sketch, using it as a rough guide. TOP TIP – use the opacity filter to fade out the pencil sketch and make it lighter, so it’s just faded in the background.
Draw each element on a different layer e.g. the bubble writing title on one layer and so on. This makes life a LOT easier if you make mistakes, want to move things around, or resize objects, or if you want to change anything in the future!
Continue drawing all the different elements, and add colour! Be consistent in using the same colours – you can create your own colour palette in Procreate. That way, your sketchnotes will quickly get a cohesive and consistent look!
Add ‘signature elements’. For me, I love a star, with a smiley face – once a teacher! Find out what your signature elements are, and include them on every sketchnote you do!
When you’re done, remember to sign your name on your work – I use my Twitter handle which leads me on nicely to my final point…
Share your work!! I share my sketchnotes on Twitter, and they also live on the Aspire 2Be website. I also like to share ‘behind the scenes’ videos – in Procreate you can download a timelapse video of the entire sketchnoting process, like this one…
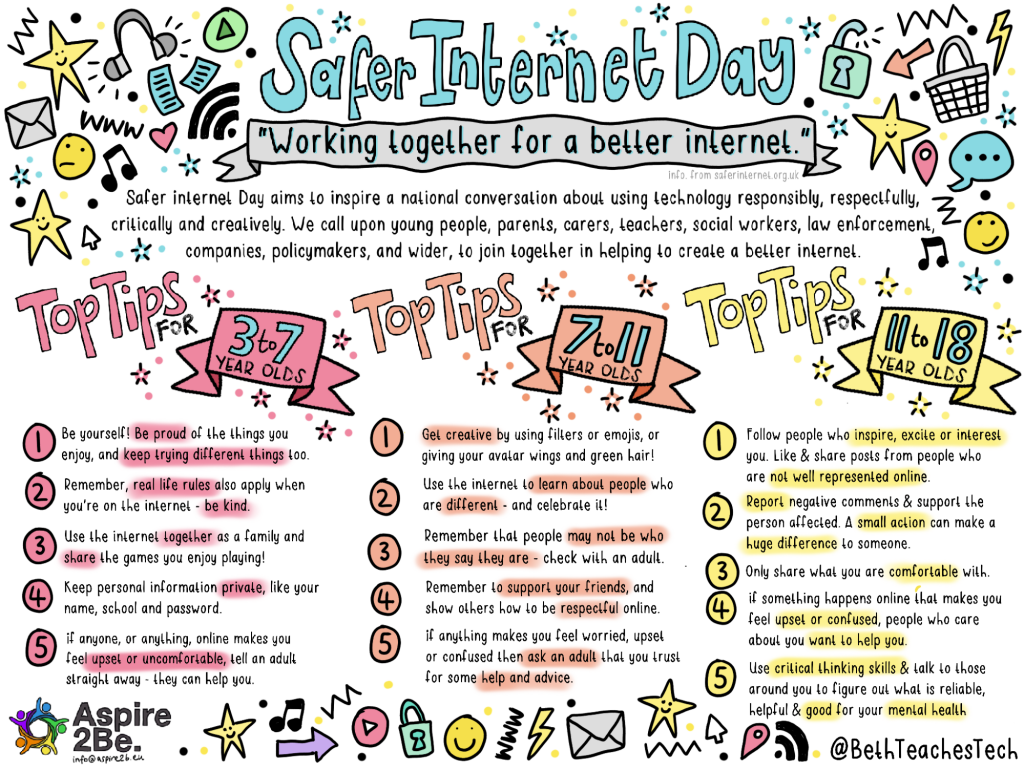
So my pencil sketch, eventually becomes a full colour sketchnote!

Now you have my checklist, what’re you waiting for?! Pick up a real pencil, or a digital pencil and get sketchnoting! There’s no right or wrong way to do it, and it’s all about having fun! Remember to tweet us with your creations – we’d love to see them!